DASHBOARD User Panel
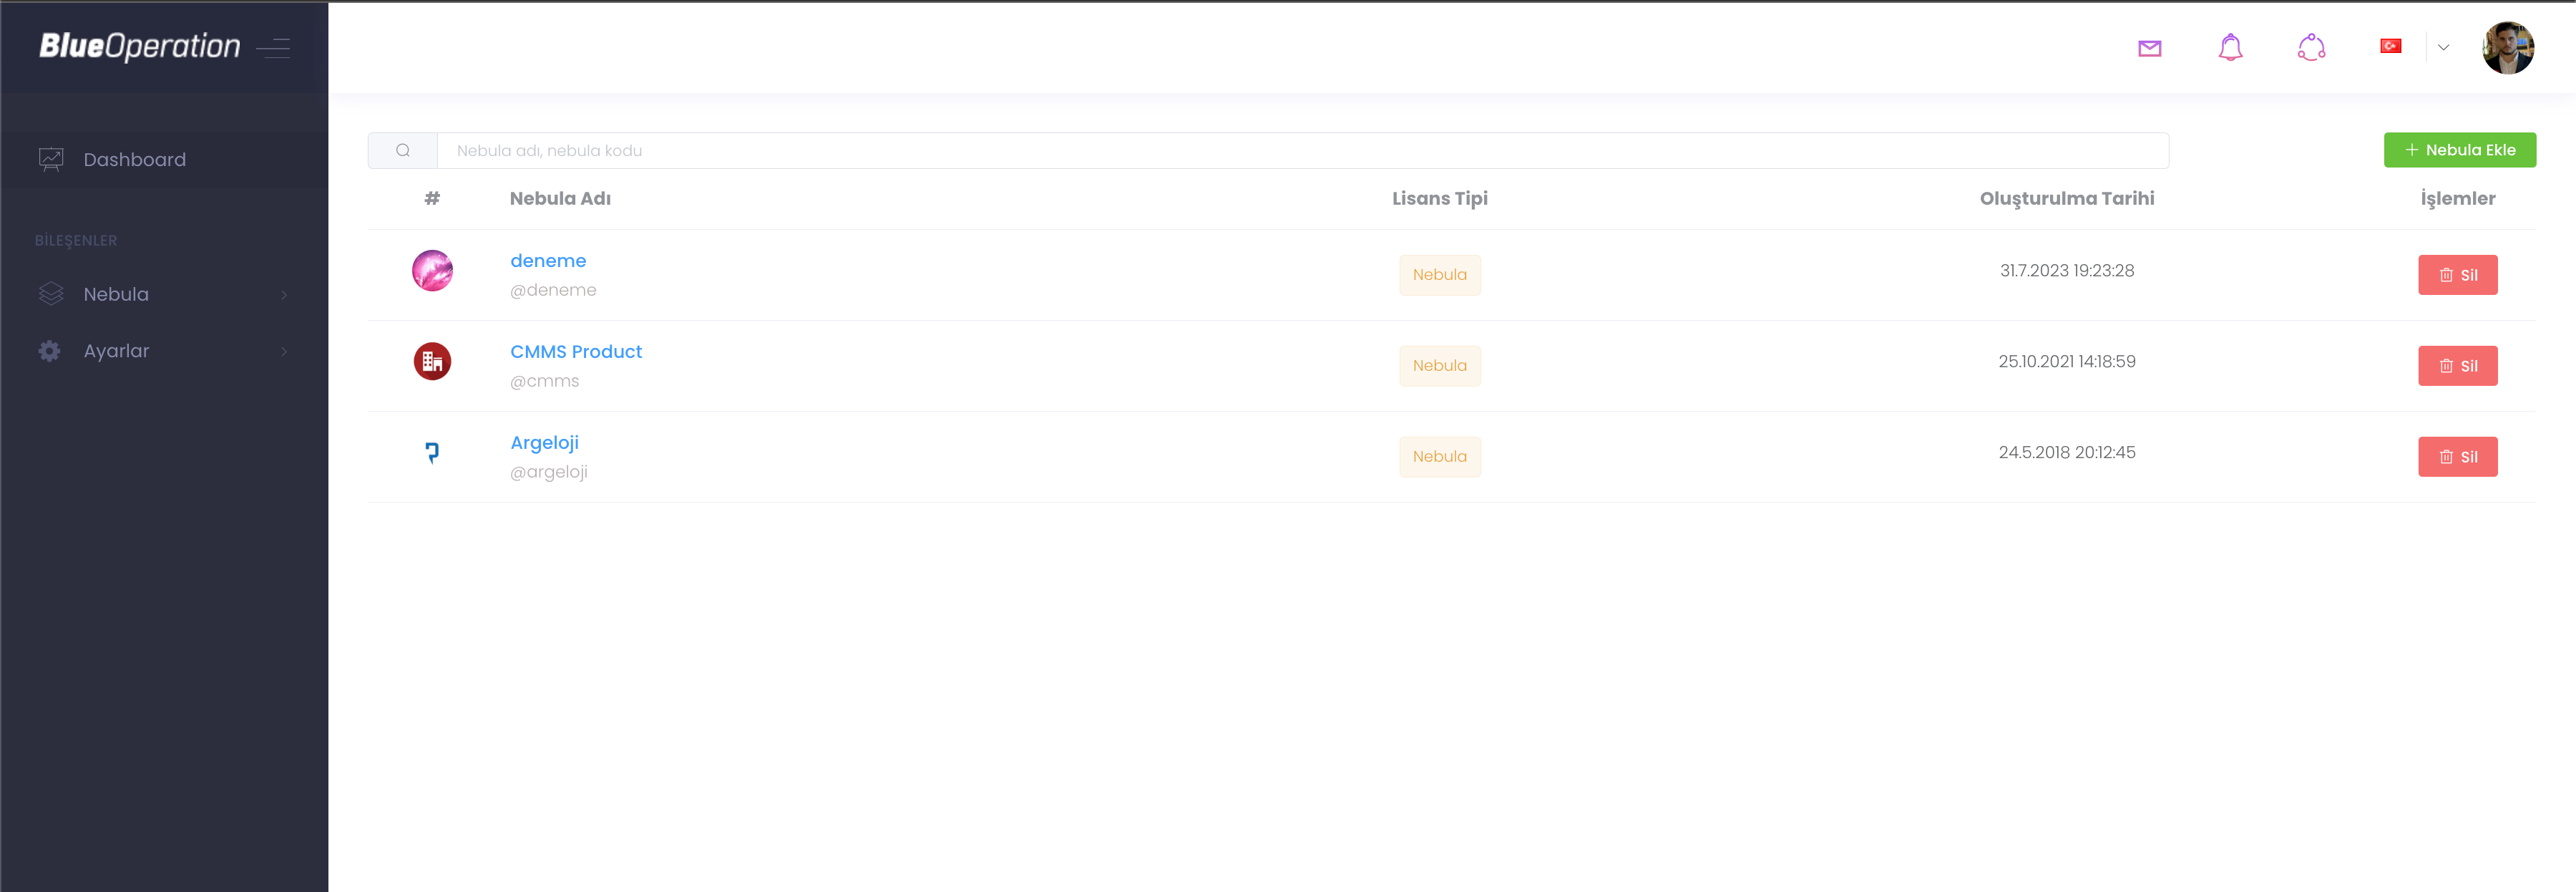
The Dashboard input section of the Dashboard allows you to choose which nebula to operate on, create a new nebula and delete the nebula you have created.
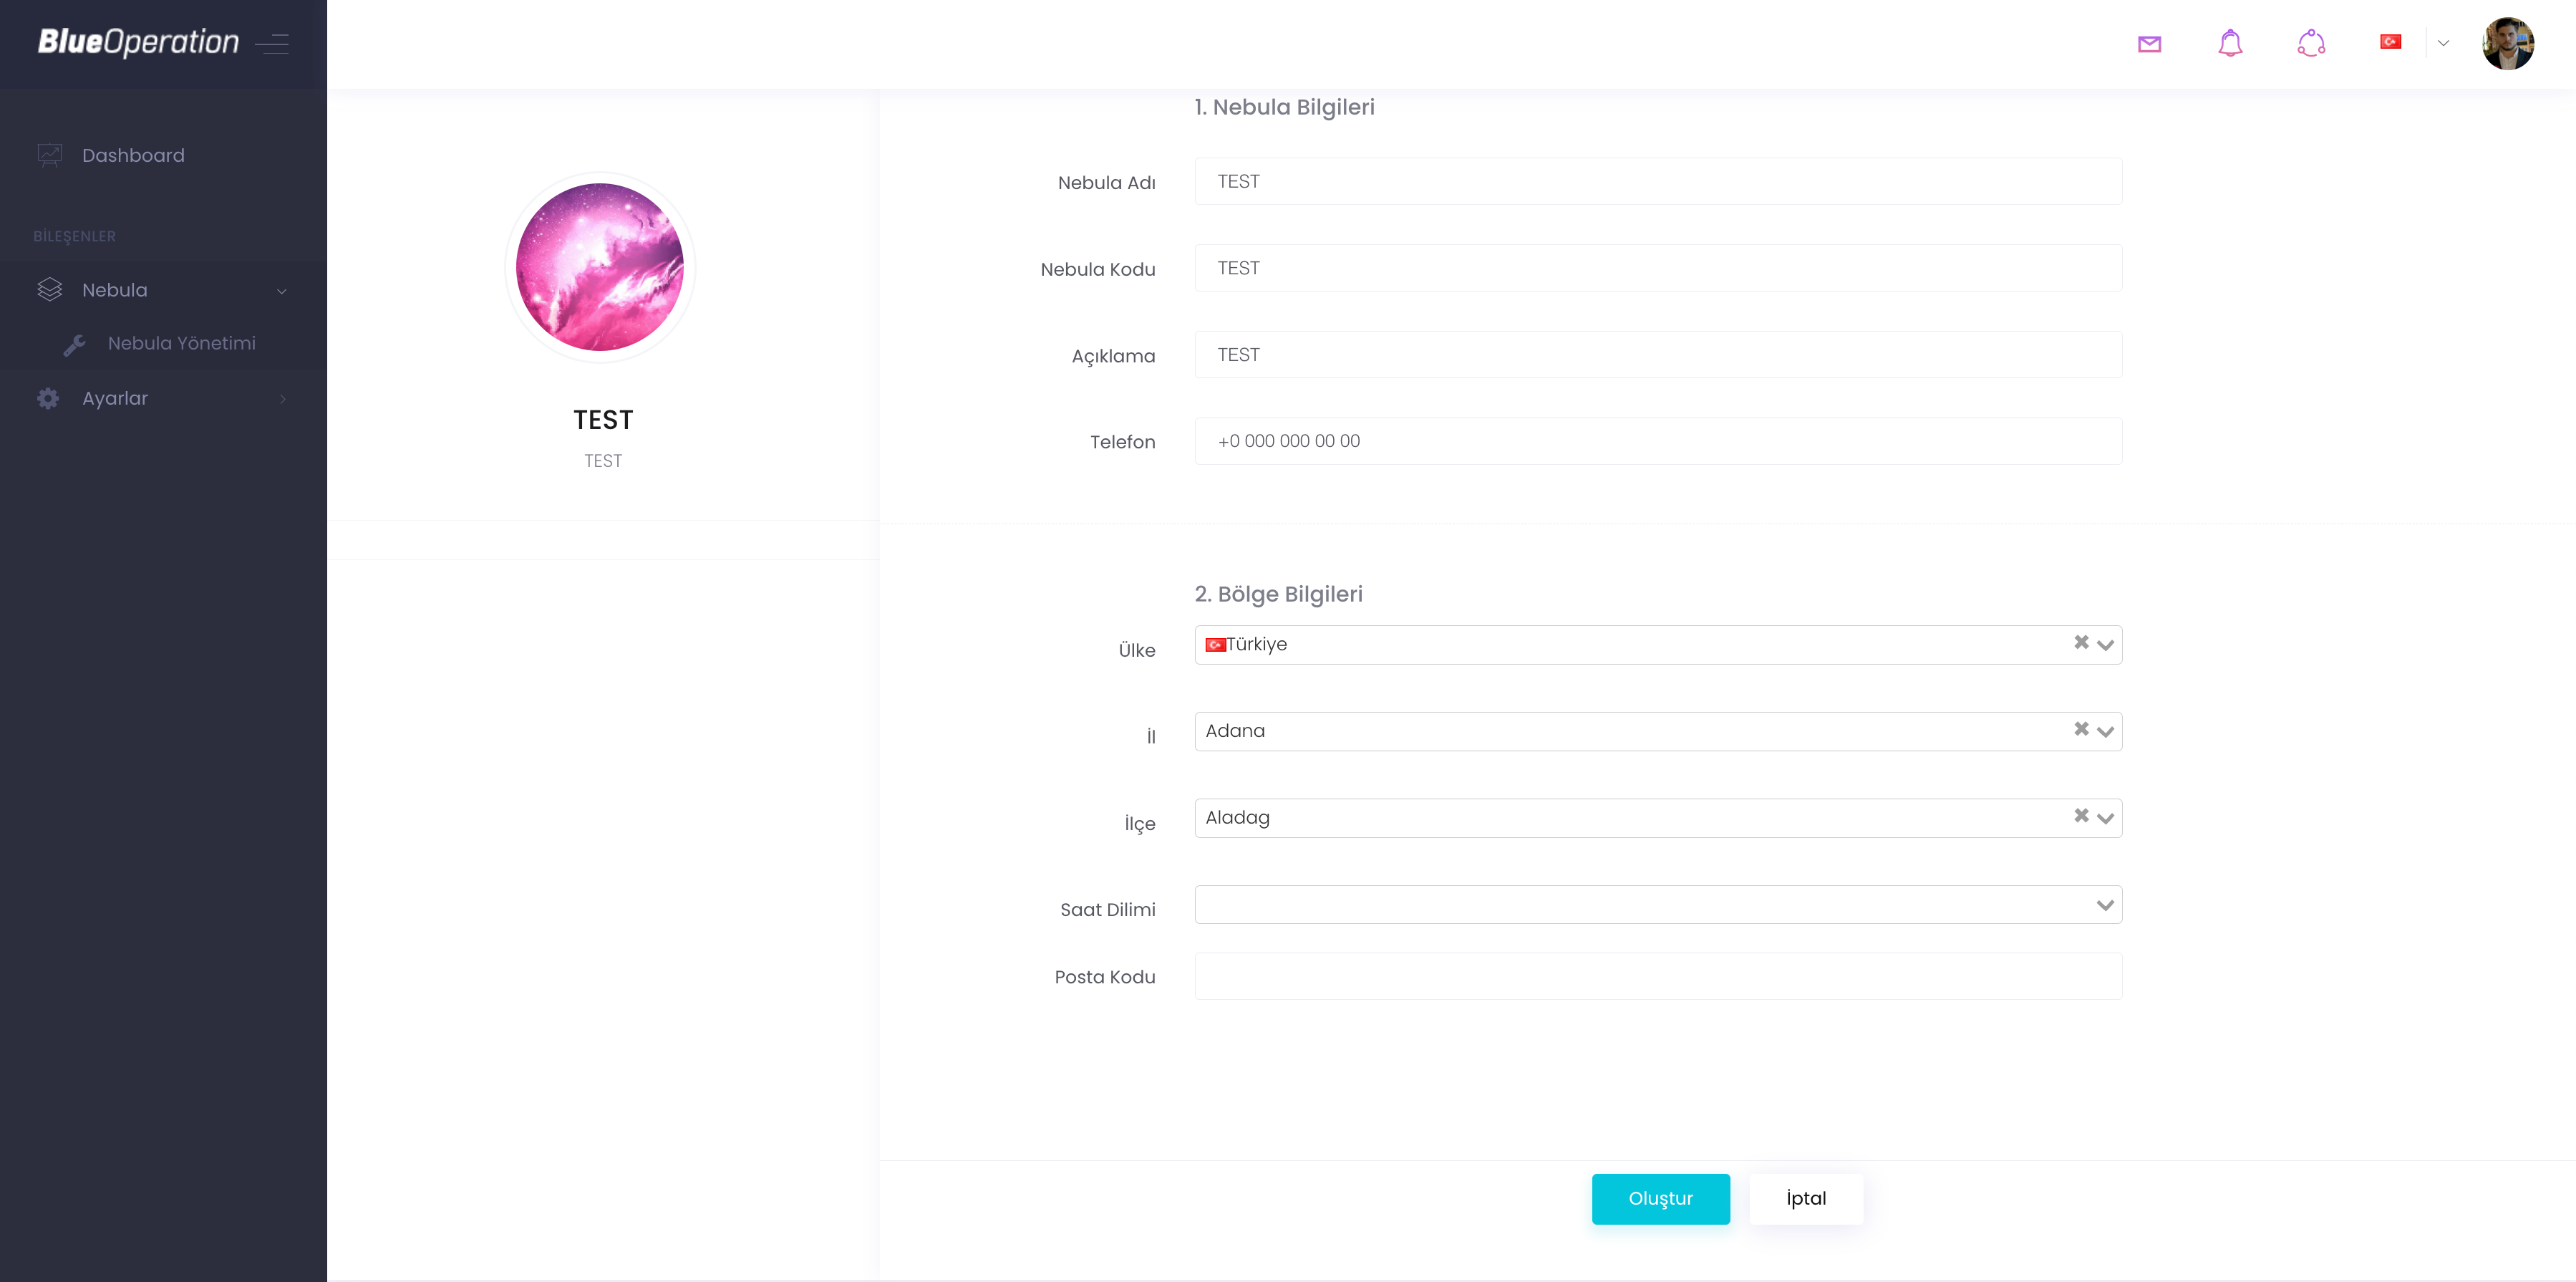
When you click on "Add nebula" you will be greeted with this page. On this page you can define the parameters you want for your nebula such as logo, name, nebula code, description. The nebula code you give should be memorable. In certain operations within the nebula and if you delete your nebula, it will ask you for `"Nebula Code".
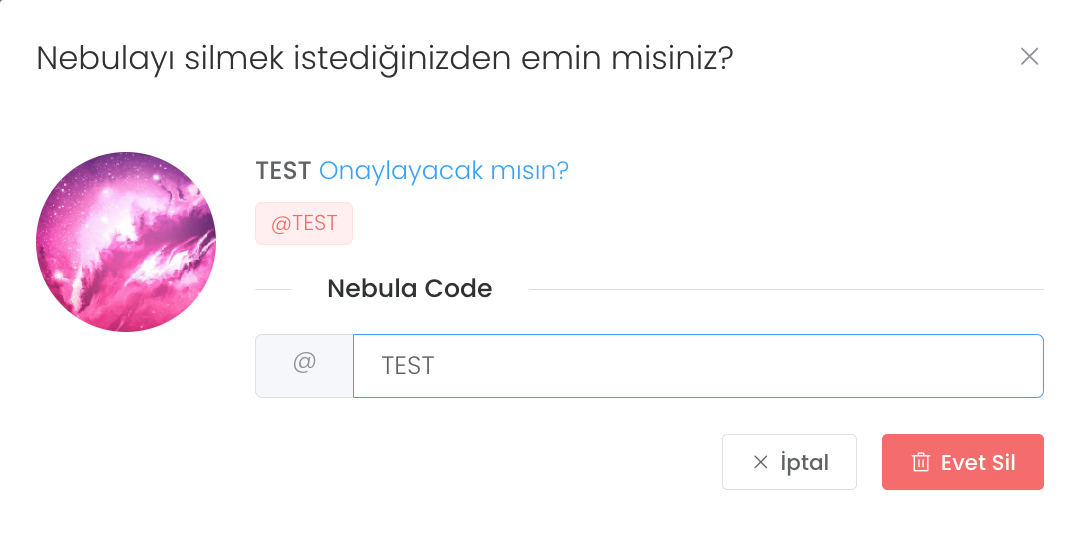
In the Nebula deletion process, you can delete the nebula you want to delete by entering the correct nebula code after clicking the Delete button on the panel or profile section. Remember that this process cannot be reversed by you.
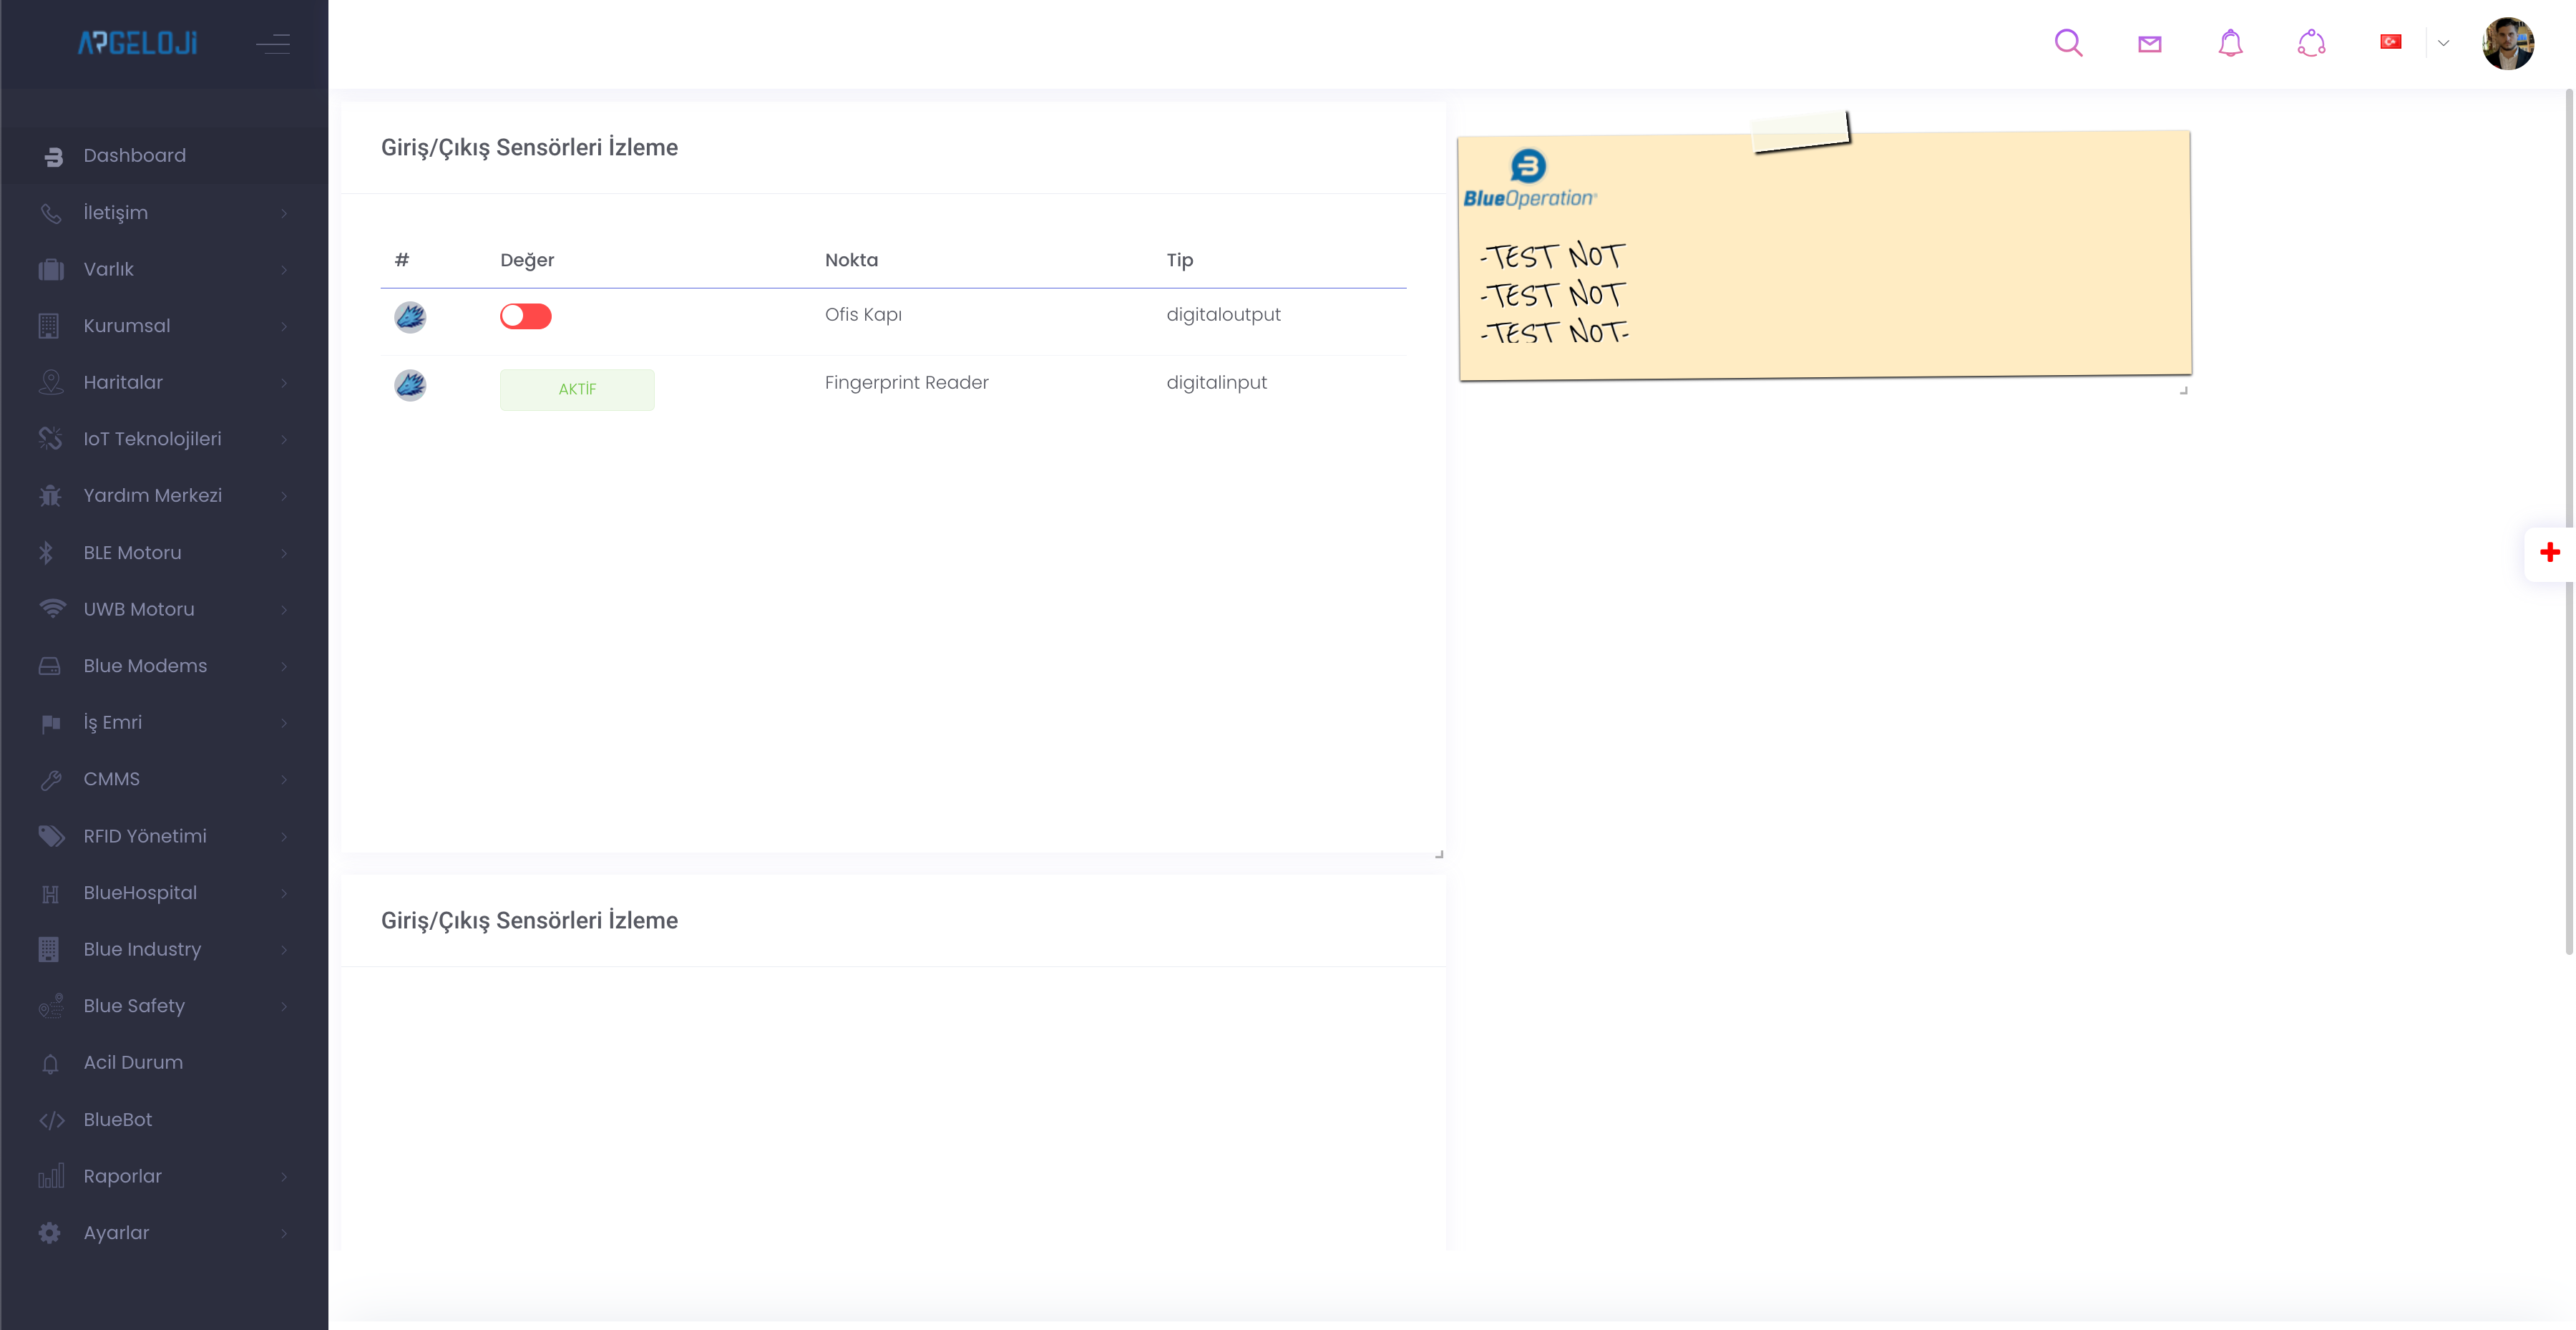
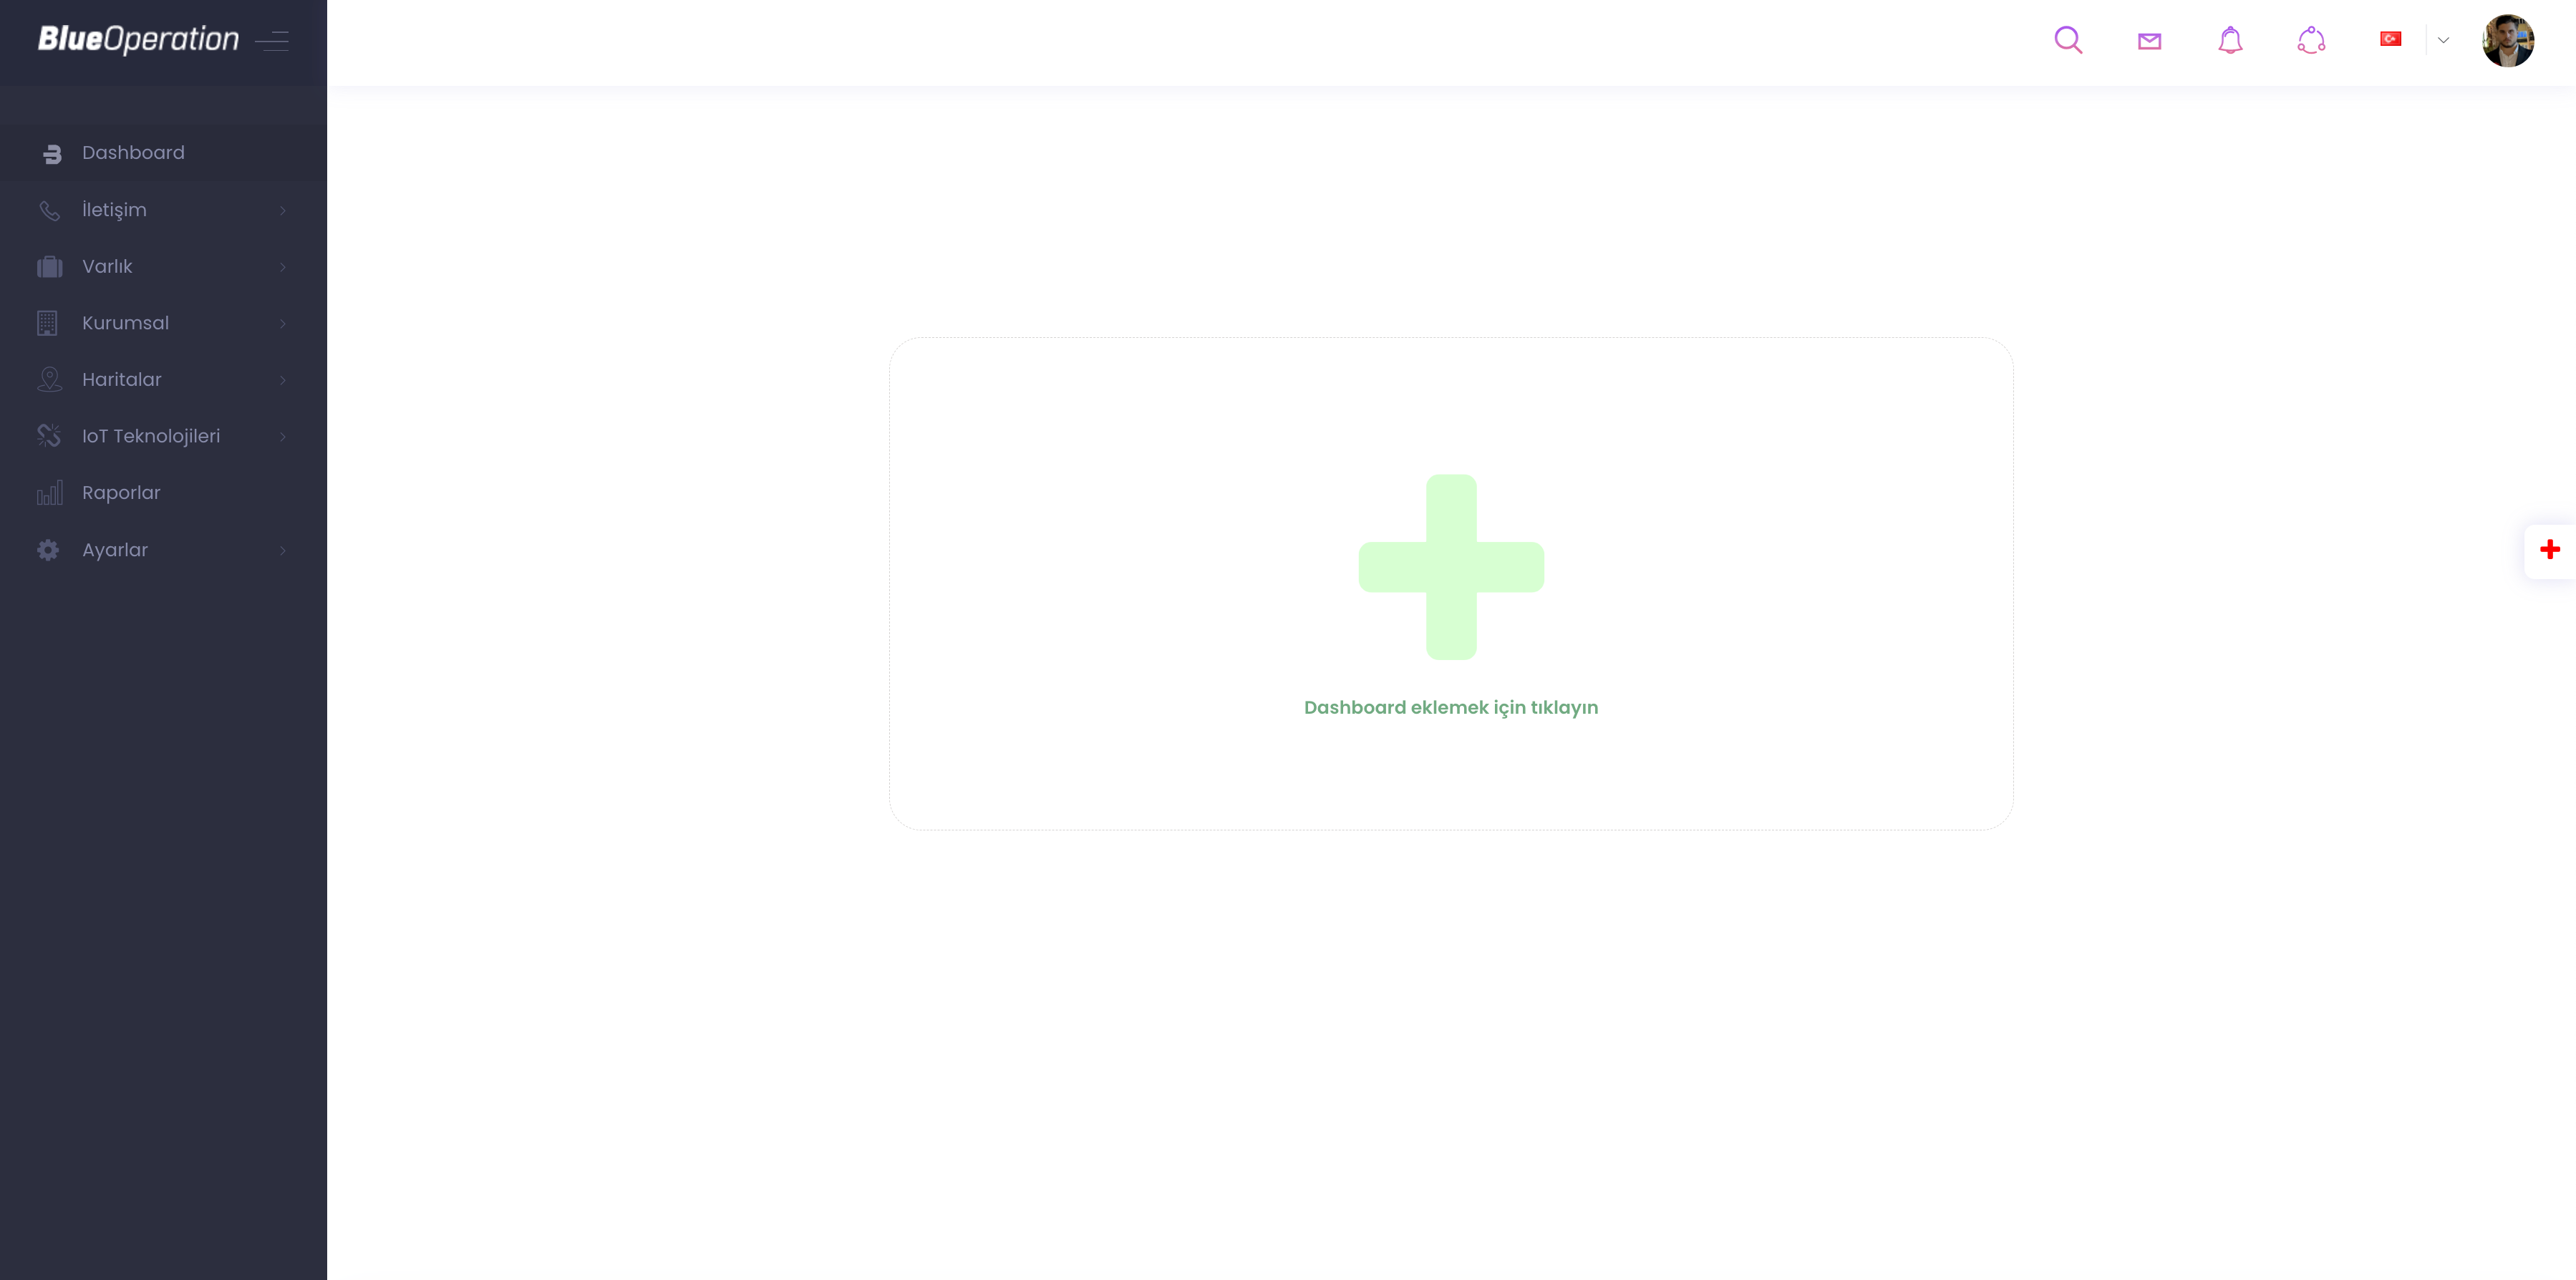
We are in a sample nebula. You have created your nebula and now it is time to personalise it. On the left side you see the technologies defined in your nebula categorised. You can add personalised dashboards by pressing the big green plus (click to add dashboard) in the middle of the screen or the small red plus on the right side. Once you add a dashboard, only the red plus button on the right will allow you to add a dashboard.
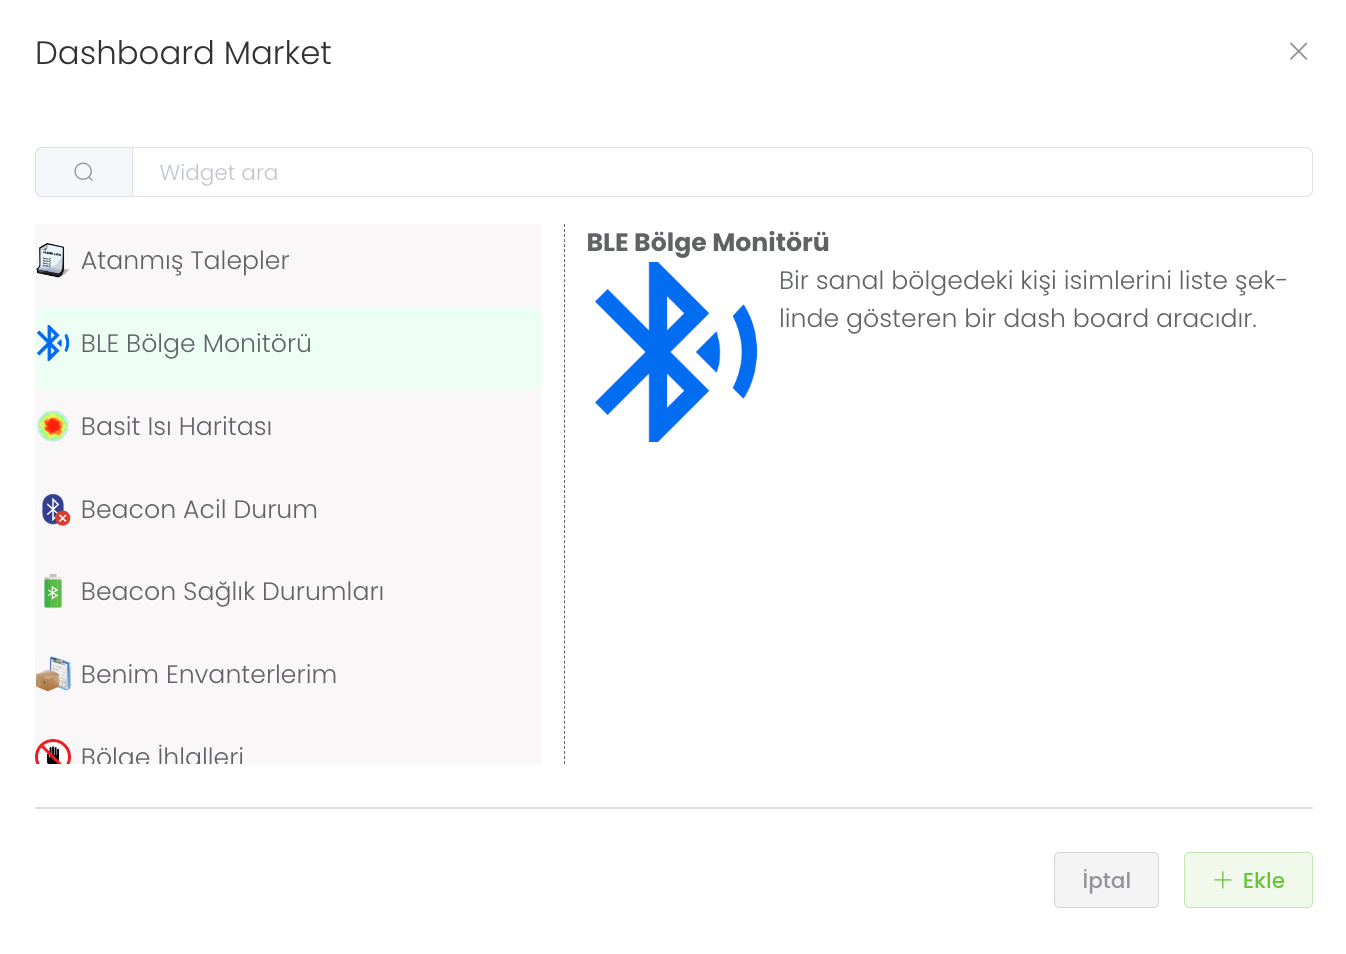
In the Dashboard Market section, you can find more than 10 widgets that help you and make your work easier and facilitate your analyses, and if the widget you click on and read the task is suitable for your workspace, you can integrate the widget into your own panel by clicking the Add button.
When you add widgets to the panel, you can personalise the sizing as you like, create your tasks, make notes to yourself and follow the modules integrated into your products.